August 6, 2011

Schoolgirl Style


Do these pictures excite you?

Do you want to know more?

Do you recognize the daisy border
and the dot letters from CTP?

Check out Melanie's  new blog!

I LOVE IT!

August 1, 2011

Where Learning is an Adventure!

For the last couple of weeks CTP has been celebrating 12 Days of BTS with contests and prizes.  On the last day teachers were asked to show us their decorThis was one of my favorite entries.  It is from Debra White who teaches second grade in Idaho.  On her website she writes, "I want to influence children by awakening an excitement for knowledge and a life-long desire to learn."  Welcome to her classroom Where Learning is an Adventure.


I LOVE, LOVE, LOVE the Dots on Chocolate decor!!!

I found this Dots on Chocolate bulletin board set last year....
and then had to have it all!


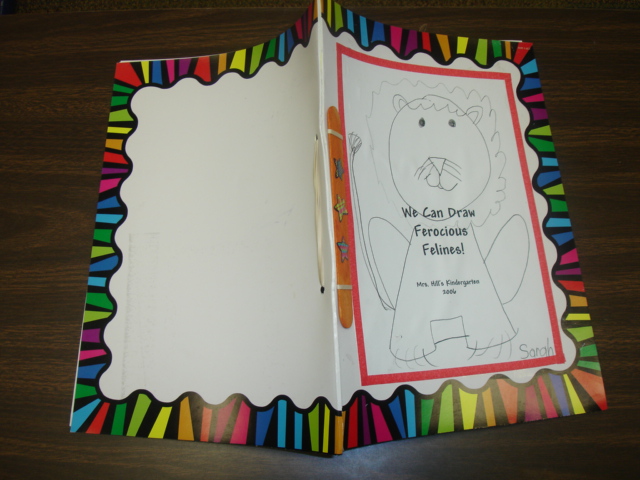
CTP 1486 Classbook Bulletin Board


I did my entire classroom in the
Dots on Chocolate with fadeless brown butcher paper.


I layered the polka-dot borders with a solid light blue, pink, or green border underneath for accent.


I love the idea of making the boards  one color.
It creates a classroom with continuity, less distracting/over-stimulating.


I also had a "Magic Tree House" theme that went perfectly with the woodsy brown color. My husband built me a tree house reading loft with the rope ladder that was suspended from the ceiling.


All the students in the entire school LOVED it!


I added a polka-dot rug for my Morning Meeting/Calendar corner for the kids to sit on.  The rug matched perfectly also, but cost me a small fortune. Shhhh.....don't tell my husband!


All of my cushions, beans bags, and pillows were either the orange, lime green, blue, or pink. This was honestly the first year that I received endless compliments on my classroom.

They thought the brown woodsy feel was rather soothing.


I think teachers, like parents, are ready for a change from the traditional
red, green, yellow, and blue.


I have lots of pictures....on my class website. http://www.whiteclassroom.com/
(I loved the pictures of the kids and well as the room. It is worth a visit!)


I selected a few to share!

Warmly,

Debra White :)

At CTP we call this a Designer Classroom.  It looks like one Martha Stewart designed! You can be a designer too. Visit http://www.creativeteaching.com/ and do a quick search for Dots on Chocolate.  SWEET!

If chocolate is not your thing (I can't imagine!) you might try our other designer looks....Poppin' Patterns and Dots on Turquoise.

Show me your pictures.  Send them to tommie.netzer@creativeteaching.com

July 26, 2011

What I did on my summer vacation

Over the 4th of July holiday I went with my entire family....
husband, kids, and grandkids...on a cruise to Alaska.

One night at dinner, I asked Trevor to tell us some things
he had done or seen for the first time. 

Here is his list....


took a helicopter ride to the top of a glacier
jumped on a glacier


looked into the deep cracks called crevices and made Dad really nervous
learned what caused the different colors of blue in the glacier ice

saw a zillion glaciers
saw a glacier calving


heard the glacier "thunder" before calving
watched the glacier fall and turn into icebergs
tried to touch the sea gulls that followed the ship after the calving


touched glacier ice that was 250 years old

went on a whale watch and saw dozens of humpback whales
saw six whales bubble net feeding

saw LOTS of mountains covered with snow


Calving is when great sheets of ice fall from the glacier into the sea.


Witnessing bubble net feeding of humpback whales is rare.


 If you are not familiar with either of the terms you should Google it and watch the YouTube videos.


All this happened within the first four days of our trip. 
It was like a science camp on a luxury liner.


That night after we had all discussed what we had seen
I had this word of advice for Trevor.


When you go back to school next month 
if someone asks you what you did during the summer,
you had better not say....
"NOTHING MUCH".


I would love to share our trip with you. 

Alaska is amazing! 

The scenery is breath-taking. 

Watching the sea gulls fly beside the ship was inspiring.  

The Mendenhall glacier is awesome.

Watching the giant whales was unbelievable.

Seeing all of this through the eyes of my grandchildren... PRICELESS.


The Smilebox is a little long so get cup of coffee or better yet a glass of wine. 
Make sure the volume is on.  I made the music match the pictures.
Turn the air conditioner down to about 60 degrees. 
(It was 101 when we left Texas and 71 when we landed in Seattle. 
That was as warm as it got the entire trip!)
Open the Smilebox, click on full screen and ENJOY!


Click to play this Smilebox slideshow
Create your own slideshow - Powered by Smilebox
This picture slideshow made with Smilebox

July 22, 2011

Here are the Winners

This is from Amanda Richardson


I am a 1st grade teacher and have taught kindergarten for 2 years and 1st grade two way dual language for a year. I just moved so I'm beginning in a new district-again! I have never been in the same classroom for 2 years and never had the same administration for 2 years, either. I used to complain about it, but I have learned this about myself-it has kept me teachable, with-it, and VERY flexible. I am embracing it!


I LOVE book making. As a matter of fact, "Book Making" is both a literacy station AND math station in my classroom. I pre-make books for the literacy station. These books are on their levels and have words missing that they must fill in. The words are either sight words or are words from a song or poem that we have learned. For math, I place blank paper made into a book form in the station. They GO TO TOWN with this! We read books during our math time all the time so it's easy for us to talk about how it was a "math book". When they go to that work station, they can make any type of math book they want- patterns book, adding book, counting, measuring, etc.


Throughout the year we make many classroom books to go in our classroom library. We make a syllables name book at the beginning of the year and many math books throughout the year. I am always looking for more book making ideas. They kids feel a great sense of accomplishment when they are authors and THAT is important to me- that they feel wonderful, purposeful, and are confident that they can do something great! :)

I'd love to be the winner of this e-book.   I have eyed it for years.

Well, Amanda now it can be yours!

The other winners are:
Lynn Janasiewicz
Sonja Shepherd
Ana Glez
Deb Griewe
Regina O'Brien
Katryce Lanspa
Vanessa Levin
Kinberly Collatos
Tamara Fishering

Check you email for instructions for downloading your e-Book.
I had a great time reading all of your ideas.  I plan to steal a few for myself.
Have fun....Thanks for playing.

If you make anything cute send pictures!

Next week I will report on our vacation to Alaska.  We had a great time.
Have a good weekend!

July 20, 2011

Will You Be a Winner?

 Just one more day to send me your bookmaking ideas.  The winners of Bookmaking Bonanza e-Book will be announced on Friday. I have had some wonderful responses. I will share some of them after the winners are posted.  Send yours to  tommie.netzer@creativeteaching.com

Here are a couple of  ideas using CTP products for book covers.


Close this window


Poppin' Patterns® Chart Cards 10" Jumbo Designer Cut-Outs


Close this window

Poppin' Patterns® Mini Charts


Use Mini Charts and Designer Cut Outs to make book covers.


July 14, 2011

Bookmaking-It's Your Turn

Rozanne Williams wrote the Learn to Read series and many other emergent readers for Creative Teaching Press.  She has a great blog which emphasizes the hows and whys of teaching reading and writing to young learners. 
Check out her blog.
http://rozanneandfriends.blogspot.com/


Close this window

To read sample pages from the book go to 
 http://www.creativeteaching.com/p-3415-what-goes-together.aspx and click on sample pages. In her most recent post Rozanne shares a writing activity to go with the reader. Go to her blog to see a really cute book that a class made.

You have seen some of my ideas and one of Rozanne's books.

Now it is your turn!
Close this window 

Many of my ideas came from Bookmaking Bonanza (It's my favorite.)
I would like to share the book in e-book form with 10 of my followers. 

Here is what you have to do....
Send the following to  tommie.netzer@creativeteaching.com
(I cannot respond to you directly on the blog.  You must use my email!)

1. Send me a picture or idea for a book that you have made with your class.
2. I need your email address.  Some personal information about you would be nice.
I like to know my followers.
3. Register as a follower on my blog.  All my followers are my favorites!
4. Respond to my email by July 22.  I will chose 10 winners on that day.

Winners will receive a code for your e-book.  You will log on to CTP and download your book. 

Fast, easy, and FREE!

July 11, 2011

Paper Doll Book


If you want to make some really cute books
with your class, you need this book. 

You will find directions for
step-books
pop-up books
accordion books
flip books
and many more...

One of my favorites is a Paper Doll book.
This is a perfect project to display at Parent's Night.

Who Am I?
Close this window
Start with the 10" Multicultural People Cut-Outs.
CTP 6243
Have each child decorate the person
to look like him/her self.
Make a Paper Doll book for the clothes.

Inside the shirt the child writes clues to Who Am I?


Put the child's picture on the back
so parents can check their guesses.

Directions for making the book can be found at


http://www.creativeteaching.com/ctp/2234-paper-doll.pdf


Here are actual pictures of making the doll clothes.


To fit the cut-out doll start with a 6" X 9" piece of paper.


Fold the paper in half hot dog style.

Then, fold the paper again hamburger style.


Fold one more time.

Open the paper.  You should have eight sections.

Cut off sections 5 and 8.  Save them for later use.

Fold the large part in half.
 

Cut a wedge from along the bottom of the fold.


That makes the legs of the pants.


Fold in sections 1 and 4. 
That makes the shirt.
The written part of the book goes inside the shirt.


Glue parts 5 and 8 to the top of the shoulders to make the sleeves.


Decorate with buttons, ribbons, paper....
Use your imagination.


And, that's how to make a Paper Doll Book!